How to install Android Studio on Windows 10
In this tutorial, we will see how to install Android Studio on Windows 10 Operating system.
Download Android Studio:
Download the latest version of the Android studio from the Official Website.
Install Android Studio :
After downloading the android-studio-ide-171.4443003-windows.exe file, follow the below steps to install.
Step – 1: Right-click on the downloaded .exe file and Run as Administrator.
Step – 2: You will see the below Setup wizard.
Step 4:
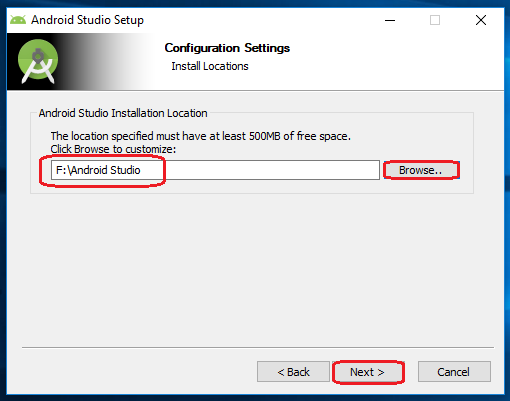
Now, browse the location where you want to install the Android Studio and click "Next" to proceed.
Step 5:
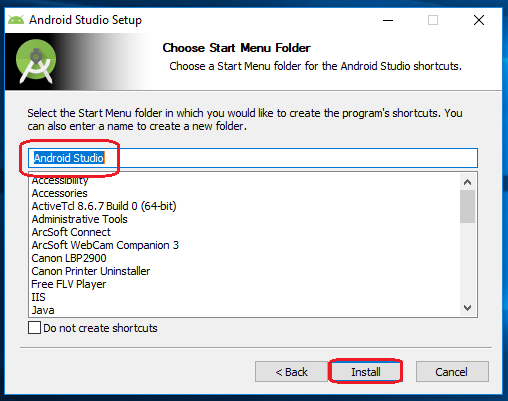
Choose a start menu folder for the "Android Studio" shortcut and click the "Install" button to proceed.
Step 6:
After the successful completion of the installation, click on the "Next" button.
Now, your Android studio welcome screen will appear on the screen.
Android Studio Setup Configuration
Step 8:
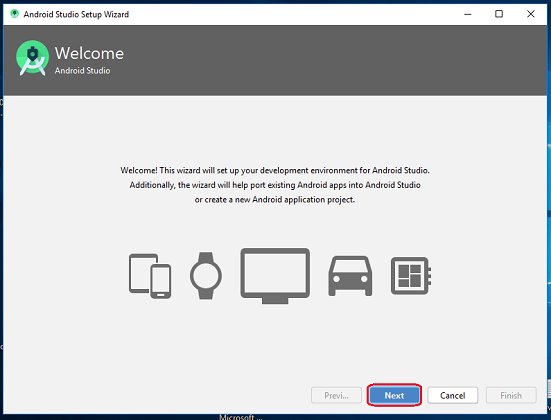
"Android Studio Setup Wizard" will appear on the screen with the welcome wizard. Click on the "Next" button.
Step 9:
Select (check) the "Standard" option if you are a beginner and do not have any idea about Android Studio. It will install the most common settings and options for you. Click "Next" to proceed.
Step 11:
Now, click on the "Finish" button to download all the SDK components.
And, the downloading and installation process of components gets started.
Congrats, your Android Studio has been successfully installed in your system and you can start a new Android studio project.
Conclusion
By following the above steps, you can download and install Android Studio in Windows 10.
I hope you enjoyed this article. Follow Android Wale Bhaiya to learn more new and amazing things about Android Development and Android.
Thanks for reading this article
#Androidwalebhaiya #Androiddevelopment


No comments: